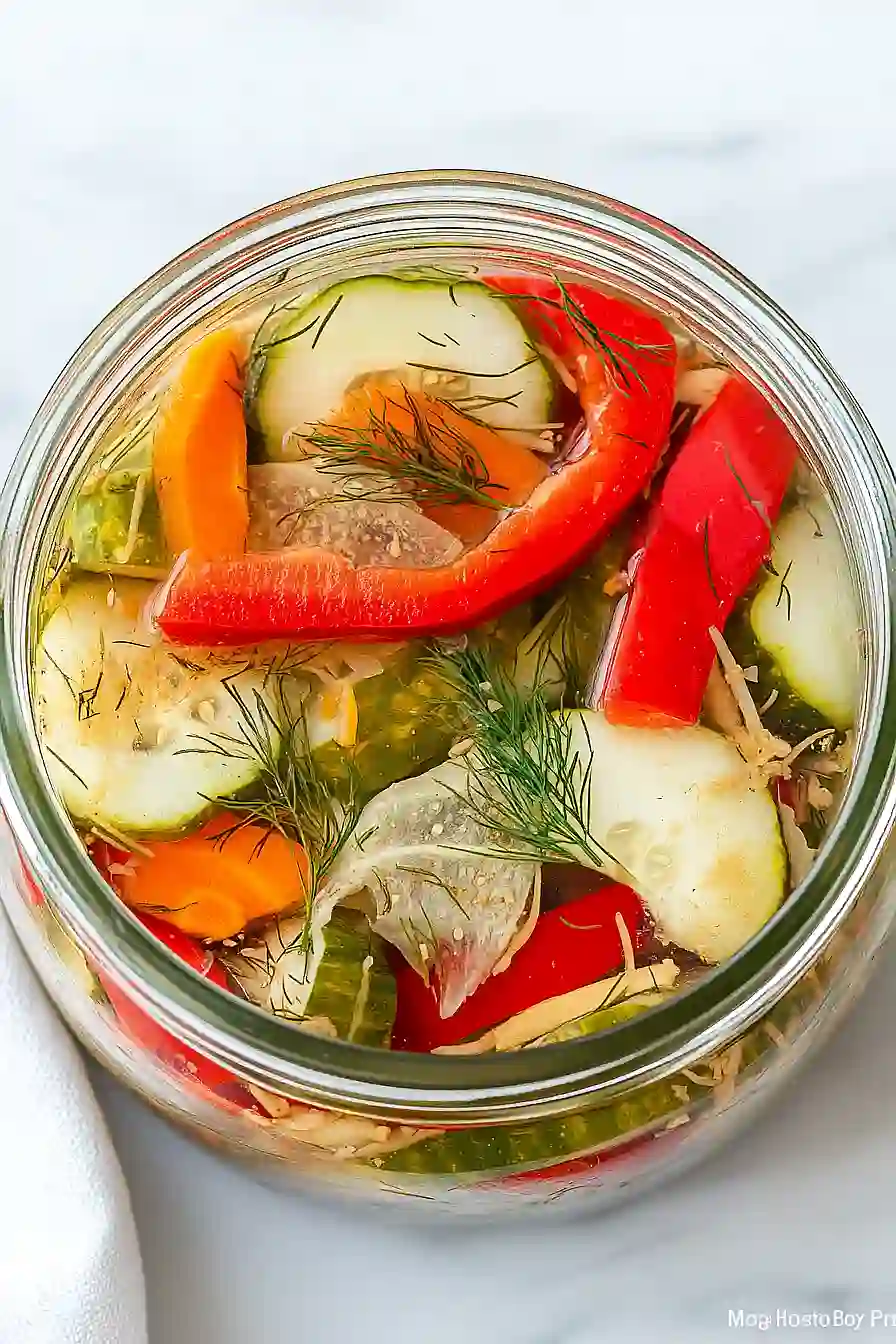
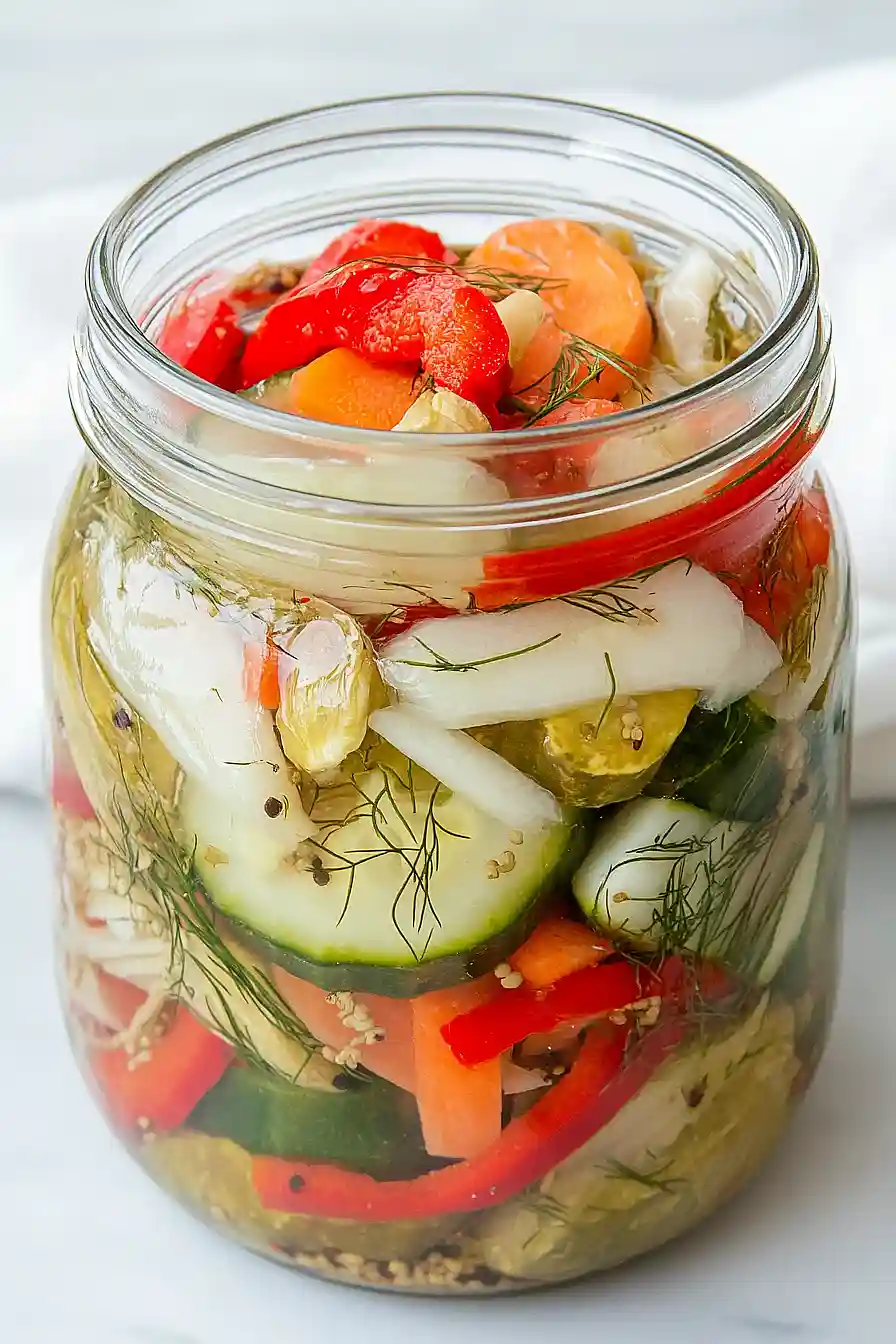
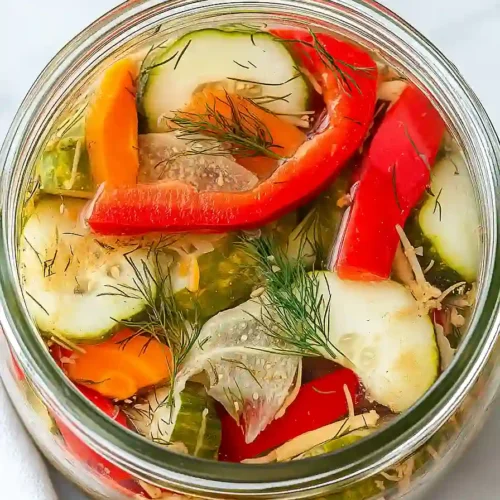
Here is my favorite dill pickle vegetable recipe, with crisp carrots, cauliflower, and green beans in a tangy brine made with fresh dill, garlic, and just the right amount of vinegar.
These pickled vegetables are always the first thing to disappear at our family barbecues. I keep a jar in the fridge at all times because my kids love them as an after-school snack. There’s something so satisfying about that perfect crunch, right?
Why You’ll Love These Dill Pickle Vegetables
- Quick and easy preparation – In just 45-65 minutes, you can transform fresh vegetables into tangy, flavorful pickles that taste like they’ve been aging for weeks.
- Uses up extra vegetables – This is perfect for when you have too many vegetables from your garden or farmer’s market haul that you need to preserve before they go bad.
- Simple pantry ingredients – You probably already have most of what you need – just vinegar, sugar, salt, and some basic spices to create these delicious pickles.
- Customizable to your taste – You can use whatever vegetables you have on hand and adjust the garlic and dill to match your family’s preferences.
- Great for meal prep – These pickled vegetables keep well in the fridge and make a perfect side dish or snack that adds crunch and flavor to any meal.
What Kind of Vegetables Should I Use?
For dill pickle vegetables, you’ll want to stick with harder, crunchier vegetables that can hold up well to the pickling process. Think carrots, cauliflower, green beans, radishes, and bell peppers – these all maintain their texture and won’t get mushy after sitting in the brine. You can also add onions, which become sweet and tangy after pickling. Softer vegetables like tomatoes or zucchini aren’t the best choice here since they tend to get soggy and lose their appeal. The key is choosing vegetables that will still have a nice bite to them even after they’ve absorbed all those pickle flavors.
Options for Substitutions
This pickle recipe is pretty forgiving, so here are some swaps you can make:
- Pickling salt: If you can’t find pickling salt, kosher salt works great too. Just avoid table salt since it contains additives that can make your brine cloudy.
- Fresh dill heads: No fresh dill? Use 5 teaspoons of dill seeds instead, or try 2-3 tablespoons of dried dill weed. The flavor will be slightly different but still tasty.
- White vinegar: You can substitute with apple cider vinegar for a milder taste, but stick with white vinegar if you want that classic sharp pickle flavor.
- Sugar: For a less sweet pickle, you can reduce the sugar by half. If you’re avoiding sugar altogether, try using the same amount of honey, but dissolve it completely in the warm brine.
- Mixed vegetables: Stick with harder vegetables like carrots, cauliflower, green beans, and radishes. Softer veggies like tomatoes or zucchini will get mushy. Cucumbers, bell peppers, and onions are also great choices.
- Whole peppercorns: If you don’t have whole peppercorns, you can skip them entirely or add a pinch of red pepper flakes for some heat instead.
Watch Out for These Mistakes While Cooking
The biggest mistake when making dill pickle vegetables is using soft vegetables like tomatoes or zucchini, which will turn mushy in the brine – stick to harder vegetables like carrots, cauliflower, green beans, and radishes that can hold their crunch.
Another common error is not sterilizing your jars properly, which can lead to spoilage, so make sure to boil your jars and lids for at least 10 minutes before filling them.
Don’t skip letting the brine cool slightly before pouring it over your vegetables, as boiling hot liquid can make even sturdy vegetables go limp, and always leave about ½ inch of headspace at the top of each jar for proper sealing.
For the best flavor, resist the urge to open your pickles too early – they need at least 24-48 hours in the refrigerator to develop that tangy, dill-packed taste you’re craving.

What to Serve With Dill Pickle Vegetables?
These tangy pickled vegetables are perfect alongside hearty sandwiches like pastrami, corned beef, or even a simple turkey and cheese – the acidity cuts through rich meats beautifully. I love adding them to charcuterie boards where they provide a nice contrast to creamy cheeses and cured meats. They’re also great as a side dish with grilled burgers, hot dogs, or barbecue since the dill and vinegar help balance out smoky, fatty flavors. For a lighter option, try them chopped up in potato salad or served alongside roasted chicken for a bright, zesty kick.
Storage Instructions
Keep Fresh: Your pickled vegetables will keep beautifully in the refrigerator for up to 2 months once they’re properly sealed in their jars. Make sure the brine completely covers all the vegetables to prevent any spoilage. The flavors actually get better after a few days, so don’t be afraid to let them sit and develop that tangy goodness.
Make Ahead: This is actually the perfect make-ahead recipe since pickled vegetables need time to develop their flavor. I like to make a big batch on Sunday and let them pickle for at least 24 hours before digging in. They’re ready to eat after a day, but honestly taste even better after a week of sitting in that dill brine.
Serve: Always use clean utensils when grabbing pickles from the jar to keep them fresh longer. These are fantastic straight from the fridge as a snack, on sandwiches, or as a side dish. The cold, crisp texture is part of what makes them so addictive!
| Preparation Time | 30-45 minutes |
| Cooking Time | 15-20 minutes |
| Total Time | 45-65 minutes |
| Level of Difficulty | Medium |
Estimated Nutrition
Estimated nutrition for the whole recipe (without optional ingredients):
- Calories: 1000-1200
- Protein: 20-30 g
- Fat: 2-4 g
- Carbohydrates: 260-320 g
Ingredients
For the brine:
- 4 cups white vinegar
- 2 cups sugar
For packing the jars:
- 5 tbsp pickling salt or pure sea salt
- 10 large garlic cloves
- 5 heads fresh dill or 5 tsp dill seeds
- 2 1/2 tsp whole black peppercorns, optional
- 5 qt mixed fresh vegetables, chopped into bite-size pieces (about 4.4 lb)
For assembly:
- Boiling water
Step 1: Sterilize the Jars and Lids
Begin by sterilizing the canning jars to ensure your pickles are safe to store.
Place the jars in a pot of boiling water for 10 minutes, then remove and let them air-dry on a clean towel.
Simultaneously, heat the snap lids in a separate pot of simmering water (not boiling) to soften their sealing compound.
Keep both jars and lids hot until you’re ready to use them.
Step 2: Prepare the Vegetables
- 5 qt mixed fresh vegetables, chopped into bite-size pieces (about 4.4 lb)
Rinse all of the mixed fresh vegetables thoroughly under cold running water, then drain well.
Trim any stems or ends, and cut or slice each vegetable variety into bite-sized pieces to ensure even pickling and easy eating.
I like to use a mix of carrots, cauliflower, cucumbers, and bell peppers, but you can use whatever vegetables you love most.
Step 3: Assemble the Jars with Seasonings
- 5 tbsp pickling salt or pure sea salt
- 10 large garlic cloves
- 5 heads fresh dill or 5 tsp dill seeds
- 2 1/2 tsp whole black peppercorns, optional
- chopped mixed vegetables from Step 2
To each hot, sterilized canning jar, add 1 tablespoon of pickling salt, 2 large garlic cloves, 1 head of fresh dill (or 1 teaspoon dill seeds), and ½ teaspoon whole black peppercorns if using.
Layer the prepared vegetables into each jar, packing them tightly and gently shaking the jar after each layer to fit as many as possible.
Fill each jar to within 1 inch of the rim.
Step 4: Prepare the Vinegar Solution
- 4 cups white vinegar
- 2 cups sugar
In a medium saucepan, combine the white vinegar and sugar.
Heat the mixture over medium-high heat, stirring occasionally, until it comes to a boil.
Boil uncovered for 5 minutes to dissolve the sugar completely and form a tangy, sweet brine.
Step 5: Fill the Jars with Brine and Water
- vinegar solution from Step 4
- boiling water
Pour 1 cup of the hot vinegar solution into each jar filled with vegetables.
Then, fill each jar with boiling water, leaving about ½ inch of space at the top.
This combination ensures the vegetables are fully submerged and evenly pickled.
I like to use a ladle and a canning funnel to help reduce spills and burns.
Step 6: Seal and Process the Jars
Wipe the rims of each jar with a clean, damp cloth to ensure a good seal.
Top each jar with a hot metal lid and screw the ring on until it’s just finger-tight.
Process the sealed jars by submerging them in a boiling water bath for 15 minutes, or in a preheated 310°F (155°C) oven for 15 minutes, as preferred.
Remove jars and let them cool undisturbed on a towel.
Step 7: Ripen and Store the Pickles
Let the processed jars sit at room temperature for at least a week before opening.
This resting period allows the flavors to fully penetrate the vegetables for the best-tasting pickles.
For extra flavor, I sometimes add an extra sprig of dill right before sealing the jars.
Tasty Dill Pickle Vegetables
Ingredients
For the brine:
- 4 cups white vinegar
- 2 cups sugar
For packing the jars:
- 5 tbsp pickling salt or pure sea salt
- 10 large garlic cloves
- 5 heads fresh dill or 5 tsp dill seeds
- 2 1/2 tsp whole black peppercorns, optional
- 5 qt mixed fresh vegetables, chopped into bite-size pieces (about 4.4 lb)
For assembly:
- boiling water
Instructions
- Begin by sterilizing the canning jars to ensure your pickles are safe to store. Place the jars in a pot of boiling water for 10 minutes, then remove and let them air-dry on a clean towel. Simultaneously, heat the snap lids in a separate pot of simmering water (not boiling) to soften their sealing compound. Keep both jars and lids hot until you're ready to use them.
- Rinse all of the mixed fresh vegetables thoroughly under cold running water, then drain well. Trim any stems or ends, and cut or slice each vegetable variety into bite-sized pieces to ensure even pickling and easy eating. I like to use a mix of carrots, cauliflower, cucumbers, and bell peppers, but you can use whatever vegetables you love most.
- To each hot, sterilized canning jar, add 1 tablespoon of pickling salt, 2 large garlic cloves, 1 head of fresh dill (or 1 teaspoon dill seeds), and ½ teaspoon whole black peppercorns if using. Layer the prepared vegetables into each jar, packing them tightly and gently shaking the jar after each layer to fit as many as possible. Fill each jar to within 1 inch of the rim.
- In a medium saucepan, combine the white vinegar and sugar. Heat the mixture over medium-high heat, stirring occasionally, until it comes to a boil. Boil uncovered for 5 minutes to dissolve the sugar completely and form a tangy, sweet brine.
- Pour 1 cup of the hot vinegar solution into each jar filled with vegetables. Then, fill each jar with boiling water, leaving about ½ inch of space at the top. This combination ensures the vegetables are fully submerged and evenly pickled. I like to use a ladle and a canning funnel to help reduce spills and burns.
- Wipe the rims of each jar with a clean, damp cloth to ensure a good seal. Top each jar with a hot metal lid and screw the ring on until it's just finger-tight. Process the sealed jars by submerging them in a boiling water bath for 15 minutes, or in a preheated 310°F (155°C) oven for 15 minutes, as preferred. Remove jars and let them cool undisturbed on a towel.
- Let the processed jars sit at room temperature for at least a week before opening. This resting period allows the flavors to fully penetrate the vegetables for the best-tasting pickles. For extra flavor, I sometimes add an extra sprig of dill right before sealing the jars.