If you ask me, fruit and nut bars are one of the best treats to have in your kitchen.
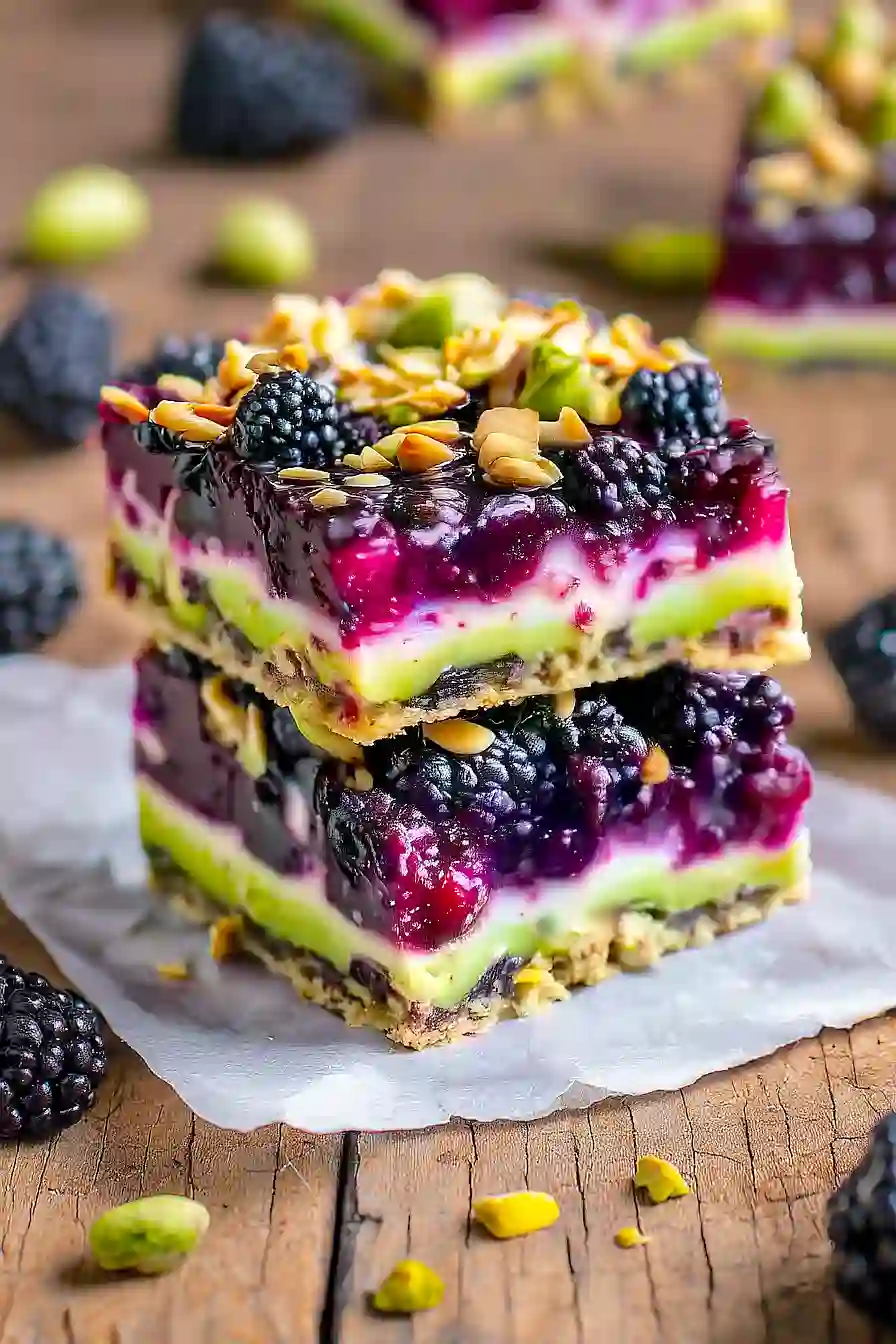
These blackberry pistachio bars make a perfect snack that’s packed with sweet and nutty flavors. Juicy blackberries pair with crunchy pistachios in a buttery, crumbly base.
The fruit gets baked right into a simple shortbread-style crust that holds everything together. A sprinkle of chopped pistachios on top adds extra crunch and makes each bite interesting.
They’re great for lunch boxes, afternoon coffee, or when you want something homemade that’s not too fancy.
Why You’ll Love These Blackberry Pistachio Bars
- Quick and easy dessert – Ready in just about an hour, these bars are perfect when you need a homemade treat without spending all day in the kitchen.
- Unique flavor combination – The sweet-tart blackberries paired with crunchy pistachios create a delicious twist on traditional fruit bars that will impress your family and friends.
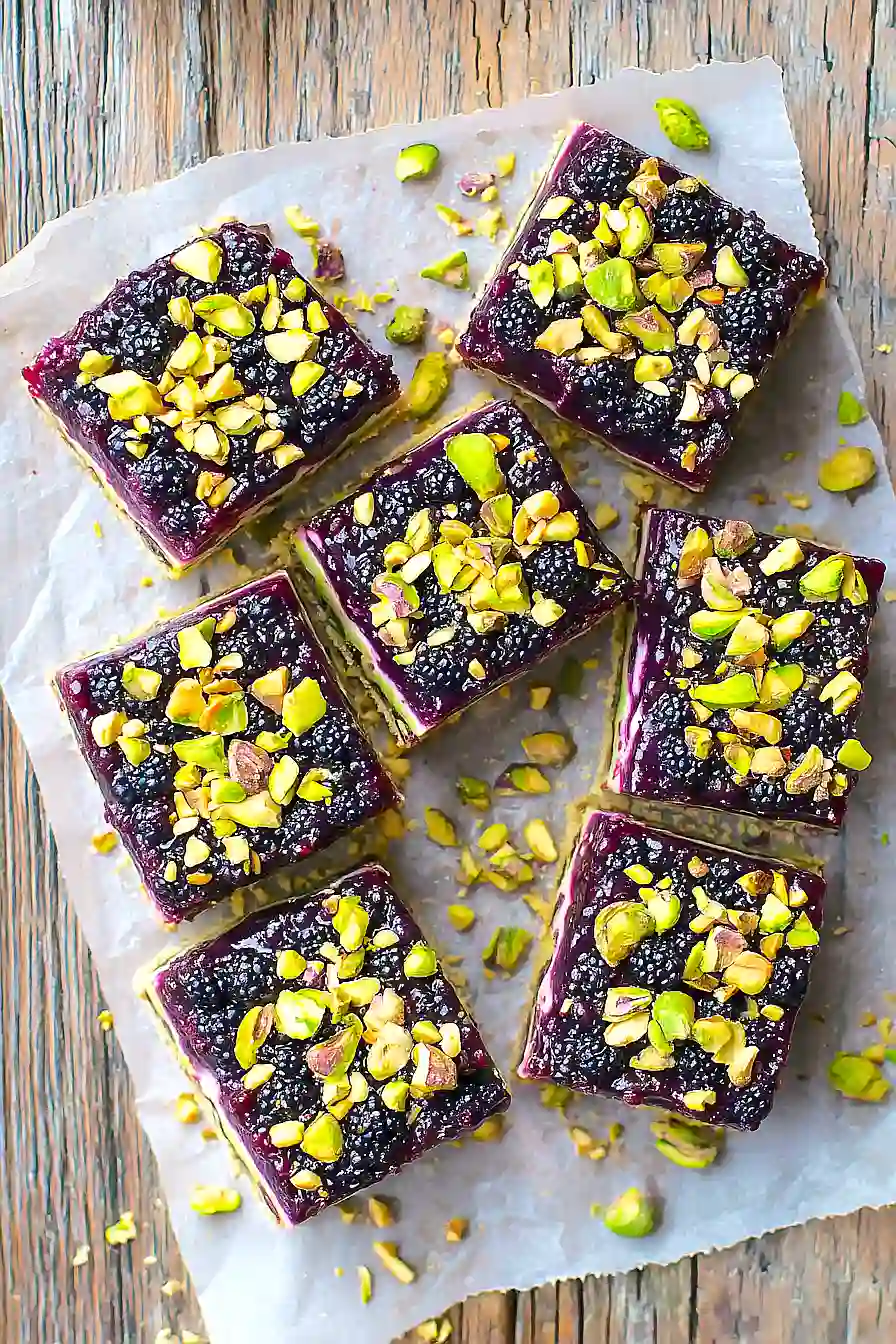
- Perfect for sharing – These bars cut into neat squares that are ideal for potlucks, bake sales, or bringing to work – everyone will be asking for the recipe.
- Great make-ahead option – They actually taste even better the next day, making them perfect for meal prep or when you want to get dessert ready in advance.
I notice that no ingredients were provided in the ingredient list for the Blackberry Pistachio Bars recipe. Without the ingredient list, I cannot identify the main ingredient to write about.
Could you please provide the ingredient list for the Blackberry Pistachio Bars recipe so I can create the appropriate section about the main ingredient?

Options for Substitutions
I’d love to help you with substitution options for your Blackberry Pistachio Bars, but it looks like the ingredient list didn’t come through:
- Missing ingredients: Without the specific ingredients, I can’t give you targeted substitution advice. If you could share the ingredient list, I’d be happy to suggest swaps for items like different berries (raspberries or blueberries for blackberries), nuts (almonds or walnuts for pistachios), or flour alternatives if needed.
Watch Out for These Mistakes While Baking
The biggest mistake when making fruit bars is not properly preparing your pan – always line it with parchment paper and lightly grease it to prevent sticking and ensure easy removal.
Another common error is overbaking the bars, which can make them dry and crumbly instead of chewy and tender, so start checking for doneness about 5 minutes before the recommended time.
To prevent your blackberries from bleeding too much color and making the bars soggy, gently toss them with a tablespoon of flour before folding them into the batter.
For the best texture, let the bars cool completely in the pan before cutting – this allows them to set properly and prevents them from falling apart when you slice them.
What to Serve With Blackberry Pistachio Bars?
These bars are perfect on their own, but they really shine when served with a scoop of vanilla ice cream or a dollop of fresh whipped cream. The creamy texture pairs beautifully with the sweet-tart blackberries and crunchy pistachios. I love serving them alongside a hot cup of coffee or tea for an afternoon treat, and they also make a great addition to any dessert spread at parties or potlucks. For something extra special, try drizzling a little honey over the top or serving with a glass of cold milk.
Storage Instructions
Store: These blackberry pistachio bars keep really well at room temperature in an airtight container for up to 5 days. I like to cut them into squares and layer them with parchment paper so they don’t stick together. They actually taste even better the next day once all the flavors have had time to meld!
Refrigerate: If your kitchen is warm or you want them to last longer, pop them in the fridge where they’ll stay fresh for up to a week. The bars will be a bit firmer when cold, but they’re still delicious. Just let them sit out for a few minutes before serving if you prefer them at room temperature.
Freeze: These bars freeze like a dream! Wrap individual pieces in plastic wrap or store them in a freezer-safe container with parchment between layers. They’ll keep for up to 3 months, and you can thaw them at room temperature whenever you need a sweet treat.
| Preparation Time | 15-20 minutes |
| Cooking Time | 40-45 minutes |
| Total Time | 55-65 minutes |
| Level of Difficulty | Medium |
Estimated Nutrition
Estimated nutrition for the whole recipe (without optional ingredients):
- Calories: 0-0
- Protein: 0-0 g
- Fat: 0-0 g
- Carbohydrates: 0-0 g
Ingredients
For the crust:
- 1 cup all-purpose flour
- 1/2 cup granulated sugar
- 1/4 tsp salt
- 1/2 cup unsalted butter, chilled
For the filling:
- 2 large eggs
- 2/3 cup sugar
- 1 tsp vanilla extract
- 1/2 cup chopped pistachios
- 1 cup fresh blackberries
Step 1: Prepare the Baking Pan and Preheat Oven
Preheat your oven to 350°F (175°C) to ensure it reaches the right temperature for baking.
Lightly grease a baking pan so the crust doesn’t stick later.
Step 2: Make the Crust
- 1 cup all-purpose flour
- 1/2 cup granulated sugar
- 1/4 tsp salt
- 1/2 cup unsalted butter, chilled
In a mixing bowl, combine the 1 cup all-purpose flour, 1/2 cup granulated sugar, and 1/4 teaspoon salt.
Cut in the 1/2 cup unsalted butter, chilled, using a pastry blender or two forks until the mixture resembles coarse crumbs.
Evenly press this crumb mixture into the bottom of the prepared baking pan.
Step 3: Bake the Crust
Place the pan with the crust in the preheated oven and bake for about 15 minutes, or until the edges are lightly golden.
Remove the pan from the oven and set aside.
I always let the crust cool for at least 5 minutes before pouring the filling to help prevent a soggy bottom.
Step 4: Prepare the Filling
- 2 large eggs
- 2/3 cup sugar
- 1 tsp vanilla extract
- 1/2 cup chopped pistachios
- 1 cup fresh blackberries
In a separate bowl, whisk together the 2 large eggs, 2/3 cup sugar, and 1 teaspoon vanilla extract until the mixture is smooth and pale.
Gently fold in the 1/2 cup chopped pistachios and 1 cup fresh blackberries, being careful not to crush the berries too much.
Step 5: Assemble and Bake the Bars
- filling from Step 4
- baked crust from Step 3
Pour the prepared filling (from Step 4) evenly over the cooled baked crust (from Step 3) in the pan.
Return the pan to the oven and bake for an additional 25-30 minutes, or until the top is set and just starting to turn golden.
Step 6: Cool, Slice, and Serve
Remove the pan from the oven and allow the bars to cool completely in the pan before cutting into squares.
Serve and enjoy!
For a cleaner cut, I like to chill the bars in the fridge for 30 minutes before slicing.